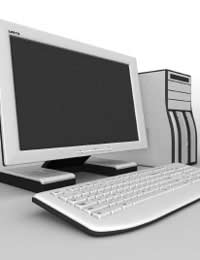
How to Set up a Computer

Buying a new computer is a very exciting process. All the new boxes to open, each one containing some technical marvel that needs to be plugged in or loaded before you get going. It can be a frustrating process too though if you don’t take a systematic approach and set aside plenty of time to ease the process of getting started. Though manufacturers have spent a lot of time making sure that computers and add-ons work seamlessly, they haven’t done much to improve the set up.
The first thing you need to do is make sure you’ve got enough space, and that the area where you’re going to be putting all the new stuff you’ve just bought is clear and clean. Then ensure you’ve got everything you need. There’s no need for any tools as such, but if you got some, keep them handy just in case.
Once you’re organised, open the boxes and check that everything that you’re supposed to have has been supplied. It’s best to start with the actual computer itself as that’s the hub of your system. You’ll be connecting everything to this so make sure that you can easily access the rear of the unit.
Connect everything and arrange all the components of your system in the position you want. Make sure that you’ve got plenty of space for your keyboard and mouse as it’s these that you’ll move most when using your PC.
Also make sure that you’re following the latest advice on how best to arrange your seat, with relation to the computer screen, to avoid RSI injuries. Search the NHS Direct website for the latest advice on RSI and how to avoid it.
Once the physical set up is completed, it’s time to turn your new computer on. This is perhaps the easiest, but most time consuming, part. Once your PC has started up there will be a number of options to choose depending upon the operating system you’ve chosen, and the supplied software your manufacturer has loaded on to the machine.
Keep handy any materials that list serial numbers and product activation codes as it will save you searching for them when prompted to use them. Once you’ve entered the details required by the operating system you may need to install the various drivers that control any printers or digital cameras you may have bought with your PC.
Simply insert the CD supplied with your peripheral and, in the vast majority of cases, it will automatically begin to install the software installation process. If it doesn’t go to My Computer, open the CD and double click on the file called install or set-up. Once you’ve installed all the software and registered all your equipment then you’re ready to go.
It might sound daunting at first but all the cables used nowadays are clearly marked and easy to match-up to the right sockets. Also, the software is easy to use as long as you read the instructions carefully and set aside plenty of time to get the whole process going.
- Is an Ipad Right for Me?
- What is a USB Pen Drive and Do I Need One?
- Should You Buy An Apple Mac or A PC?
- Using an LCD Projector for Presentations
- What is Vista and can I Upgrade my PC?
- What is RAM and What Does it do?
- How do I Stream Music From my PC to Other Rooms
- How do I Protect my PC From Bugs and Viruses?
- How can I Expand my PC?
- What are PDF's and How to Use Them
- What is Blue-Ray and HD-DVD?
- What is Wireless Internet and How do I Use it?
- How to Increase the Storage Capacity on a Computer
- How to Make Phone Calls From a PC
- How to use Word Documents
- What to Look for When Buying a Handheld PC
- How to Add Software to Your Computer
- What is Downloading and How do I do it?
- What to Look for When Buying a Printer


Re: How do I Stream Music From my PC to Other Rooms
The article is re-assuringly simple to read and understand for one such as myself with little or no…
Re: Transferring Pictures from Your Digital Camera to Your Computer
When trying to transfer pic's Im getting a box with , 'The sysytem cannot find the…
Re: How to Increase the Storage Capacity on a Computer
Choosing a Hard Disk Hard disks are available in two main sizes; 2.5in and 3.5in, though there are…
Re: How do I Stream Music From my PC to Other Rooms
Yes but; what is an 'audio streaming device'? What does it look like? How is it connected to your HiFi?…
Re: Transferring Pictures from Your Digital Camera to Your Computer
this was very helpful allI need to do now is find where the connection pionts are on…